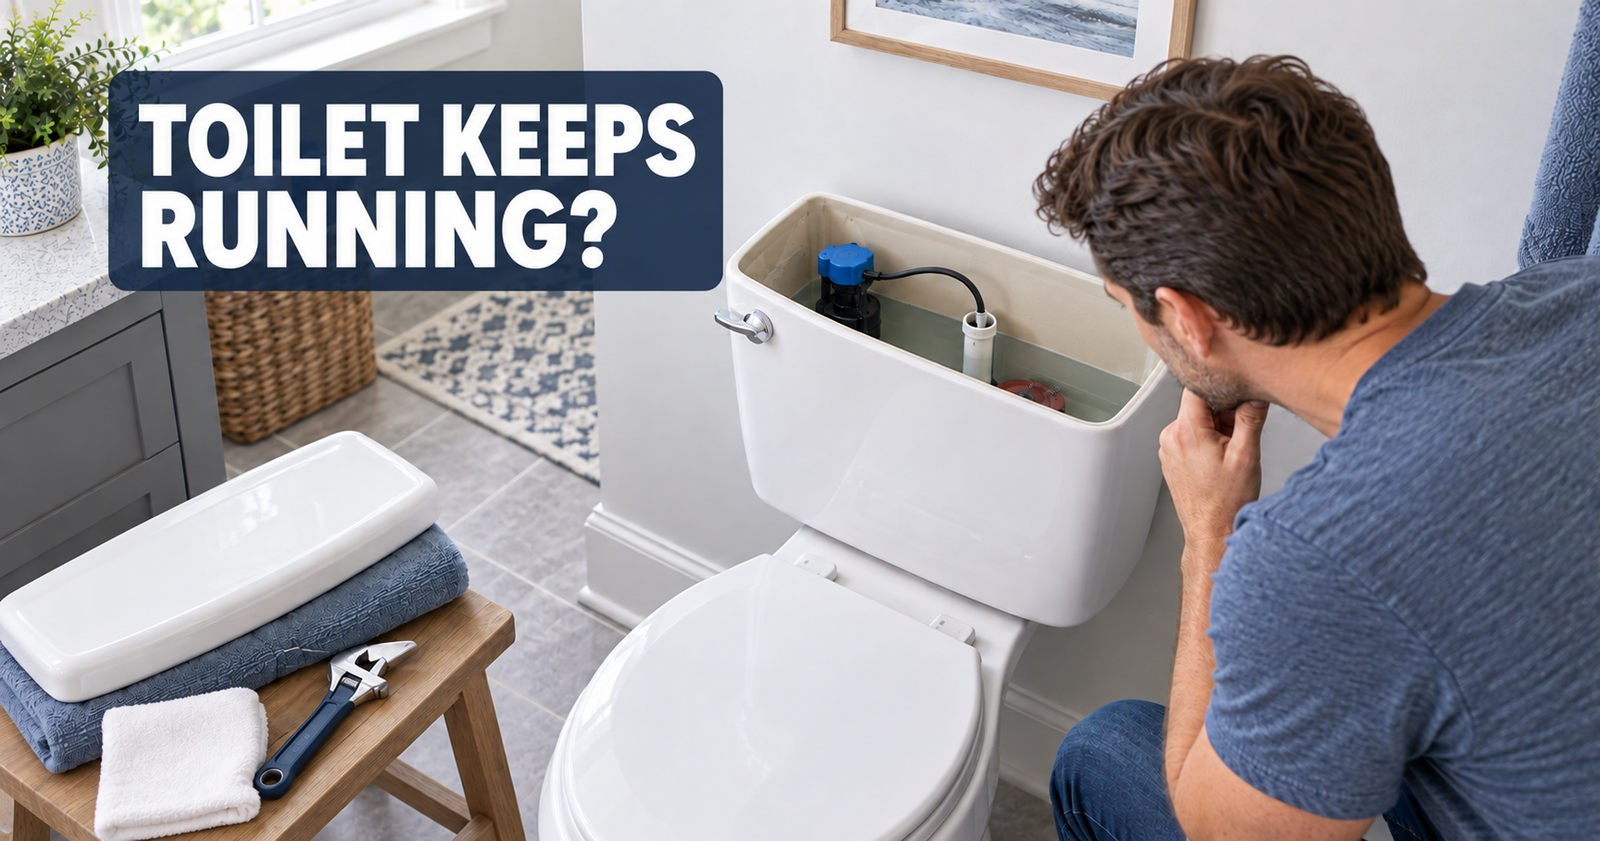
A toilet that keeps running is usually losing water in one of two ways. The fill system may be allowing tank water to reach the overflow tube, or water may be slipping past the flush seal into the bowl. In the second case, the falling tank level causes the fill valve to turn on again even though nobody flushed.
Before replacing anything, remove the tank lid and watch where the water goes. That observation can tell you whether to inspect the fill valve and float or the flapper, canister seal, and chain.
This guide covers common gravity-fed toilets with an accessible tank. Stop if you find a sealed pressure-assisted vessel, a concealed in-wall tank, cracked porcelain, water leaking onto the floor, or a shutoff valve that will not operate safely.
Identify What Kind of Running You Hear
The sound alone cannot confirm which part is causing the problem. Watch the tank through one complete flush-and-refill cycle.
| What you notice | Likely area to inspect |
| The toilet runs continuously and tank water spills into the overflow tube | Float, water-level setting, or fill valve |
| The toilet runs continuously while the water remains below the overflow opening | Flapper or canister seal being held open or leaking |
| The toilet becomes quiet and then refills later without being used | Slow tank-to-bowl leak or refill-tube siphoning |
| Jiggling the handle stops the running | Trip lever, chain, or flush-seal alignment |
| Water appears on the floor or outside the tank | External leak requiring separate attention |
Occasional refilling is sometimes called “ghost flushing,” but the toilet is not actually flushing by itself. Water is slowly leaving the tank, and the fill valve is responding to the lower water level.
Look Inside the Tank Before Adjusting Anything
Place the tank lid flat on a folded towel where it cannot be knocked over. Locate the toilet’s water-supply shutoff valve before touching any components.
Shutoff valves vary. Some use several turns, while others are quarter-turn designs. If the valve is stuck, heavily corroded, or begins leaking when moved, do not force it. Contact the property manager or a qualified plumber.
Take a clear photo of the original tank setup before moving the chain, float, or refill tube.
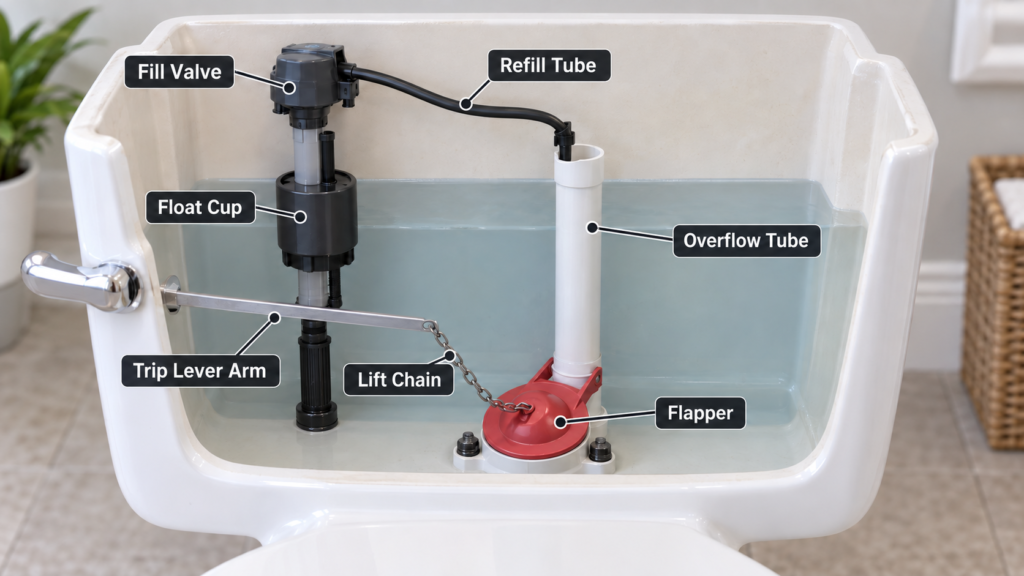
The parts may differ by model:
- The fill valve is connected to the incoming water supply at the bottom of the tank.
- The float may be a cup that moves along the fill valve or a ball attached to an arm.
- The refill tube is the small flexible hose that sends water toward the overflow assembly during refilling.
- The overflow tube is the open vertical passage near the flush valve.
- The flush seal may be a hinged flapper or a circular gasket beneath a tower-shaped canister.
- The chain or lift mechanism connects the handle’s trip lever to the flush valve.
Do not apply standard flapper instructions to a canister-style toilet. The lifting and sealing mechanisms are different.
If Tank Water Is Entering the Overflow Tube
First distinguish normal refill-tube flow from an actual overflow.
On many toilets, the small refill tube normally sends a stream of water into the overflow assembly while the tank fills. The problem occurs when the tank’s main water level reaches the overflow opening and spills into it because the fill valve has not shut off.
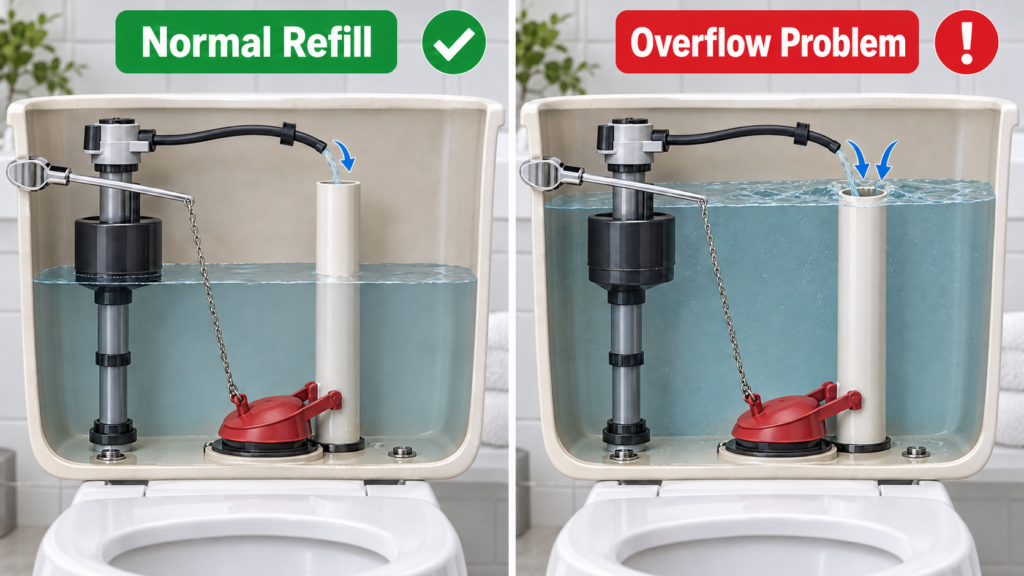
If the tank water reaches the overflow opening:
- Watch the float as the water rises. Make sure it moves freely and does not rub against the tank wall, refill tube, or another component.
- Look for a marked waterline inside the tank or on the overflow assembly.
- Adjust the float or water level only according to the toilet or fill-valve manufacturer’s directions.
- If the float reaches its intended position but water continues entering the tank, the fill valve may contain debris or may no longer close correctly.
There is no universal distance that the water must remain below the overflow tube. The correct setting depends on the toilet design.
Kohler’s running-toilet guidance identifies overflow, a binding trip lever, and debris inside the fill valve as possible causes of continuous running. Fill-valve cleaning procedures vary, so do not open an unfamiliar valve based on instructions for a different model.
Also inspect the refill tube. On some toilets, its end is held at the overflow opening with a clip. On certain canister systems, it connects to a designated port. If the open end sits below the tank waterline, water may siphon through it after the fill valve shuts off. Kohler documents the different hose positions used on canister and non-canister systems.
If the Toilet Stops and Then Refills Again
If the water stops below the overflow opening but the toilet refills later without being used, water is probably leaking slowly from the tank into the bowl.
The flush seal is the first place to inspect. A standard flapper closes over the flush-valve opening after each flush. A canister-style toilet usually seals with a circular gasket at the bottom of the canister.
Either type may leak if the seal is dirty, distorted, worn, misaligned, or prevented from closing.
Perform a Dye Test
A simple dye test can confirm whether tank water is reaching the bowl:
- Allow the tank to finish filling.
- Add a drop of food coloring to the tank water.
- Do not flush.
- Check the bowl after 10 minutes.
- If colored water appears in the bowl, water is leaking from the tank.
- Flush after the test to clear the coloring.
This follows EPA WaterSense guidance for detecting silent toilet leaks.
Food coloring is enough for this test. If you prefer a purpose-made alternative that is easier to portion, toilet leak detection dye tablets may be used according to their directions. toilet leak detection dye tablets
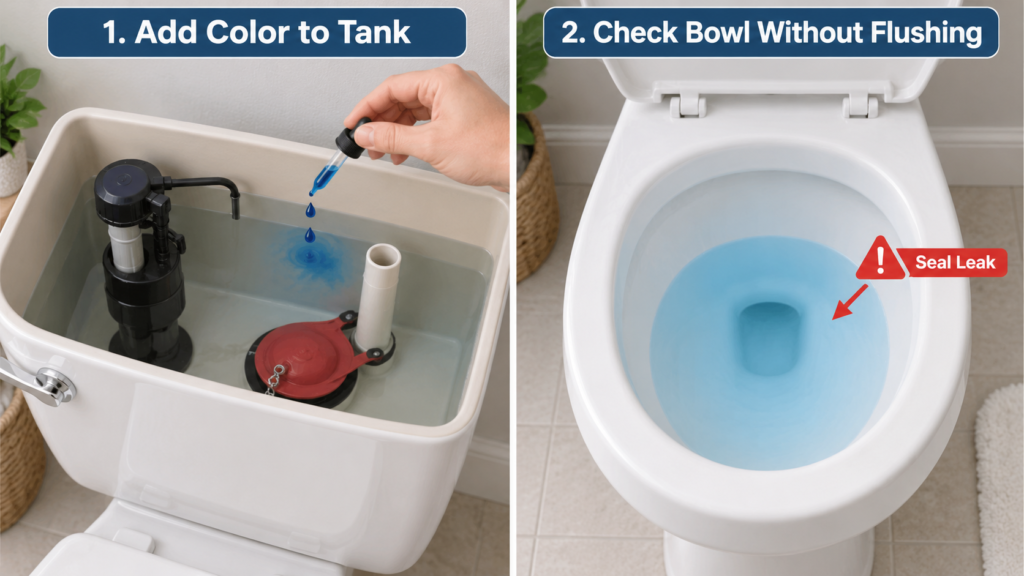
A positive dye test confirms an internal leak, but it does not automatically prove that a standard flapper is the correct replacement. Water may be passing a canister seal, flush-valve gasket, damaged seating surface, or another model-specific component.
With the supply safely off and the tank water lowered, inspect the seal and the surface beneath it. Look for loose debris, mineral buildup, distortion, cracks, or a seal that does not sit evenly. Accessible debris may be wiped away gently with a damp cloth if the manufacturer permits it. Avoid scratching the sealing surface or applying unapproved chemicals.
Check the Handle, Chain, and Seal Together
At rest, the chain should not pull the flapper or canister open. During a flush, it must lift the mechanism without tangling around the trip lever.
Do not use a universal chain measurement. The required amount of slack depends on the handle position and flush-valve design. Watch what happens instead:
- A tight chain may hold the seal slightly open.
- Excess chain may become trapped beneath a flapper or catch on the lever.
- A trip lever that rubs against the tank wall may not return fully.
- A loose or binding handle may prevent the seal from settling correctly.
If jiggling the handle stops the running, concentrate on these parts before replacing the fill valve.
Adjust only one component at a time, then flush and observe the result.
Decide Whether to Clean, Adjust, or Replace
Correct an observable positioning problem before buying a replacement part.
Adjust the component when the float is obstructed, the chain prevents the seal from closing, or the refill tube is visibly out of its manufacturer-specified position.
Clean the accessible area when debris prevents the seal from sitting flat. Some fill valves can also be flushed or cleaned, but the procedure varies. For example, American Standard provides a specific cleaning procedure for certain water-control valves. Do not assume that procedure applies to another valve.
Replace the identified part when the seal is permanently distorted or damaged, or when the fill valve continues running after the approved adjustment or cleaning procedure.
Before obtaining a replacement:
- Find the toilet’s model identifier. It may be stamped or printed inside the tank, beneath the lid, or in another manufacturer-specified location.
- Photograph the tank layout and existing part.
- Consult the manufacturer’s parts diagram or model lookup.
- Confirm whether the toilet uses a flapper, canister gasket, proprietary seal, or another mechanism.
- Verify compatibility instead of relying only on appearance.
If the toilet uses a conventional flapper and its correct dimensions and attachment style have been verified, a model-compatible replacement toilet flapper may be appropriate. Universal compatible replacement toilet flapper
Do not use that link for a canister-style toilet. Canister seals must be identified separately for the exact flush-valve design.
Retest the Complete Flush Cycle
After an adjustment, cleaning, or routine part replacement:
- Restore the water supply only if the shutoff valve operates normally.
- Watch the tank refill and confirm that the fill valve shuts off before tank water reaches the overflow opening.
- Check that the refill tube remains secured in its proper position.
- Flush once and watch the seal lift, drop, and seat.
- Wait and listen for unexpected refilling.
- Repeat the dye test if the original problem was a tank-to-bowl leak.
- Dry the supply connection, tank exterior, and floor, then check for new moisture.
A quiet tank does not prove the repair is complete if water is appearing outside the toilet.
When to Stop DIY Troubleshooting
Stop and arrange appropriate help if:
- The shutoff valve will not close or begins leaking.
- The tank, bowl, or lid has a crack.
- Water is leaking onto the floor or from the connection between the tank and bowl.
- The toilet contains a sealed pressure-assisted vessel.
- The flushing system is concealed inside a wall.
- The repair requires removing the tank or loosening badly corroded hardware.
- The toilet continues losing water after the accessible seal, chain, refill tube, float, and water level have been checked.
- You rent the home and the property requires maintenance requests instead of tenant repairs.
Water outside the toilet is a separate leak, not merely another running-toilet symptom. This guide to preventing moisture and small leaks under the kitchen sink explains how to recognize early moisture around other household plumbing.
Make Toilet Checks Part of Home Maintenance
Once the toilet is operating normally, remember what its resting water level and tank sounds are like. An occasional visual check can reveal a displaced refill tube, tight chain, changed waterline, or moisture near the supply connection.
Before using an in-tank cleaning product, check whether the toilet manufacturer permits it. Some manufacturers warn that in-tank chemicals may contribute to deterioration of certain seals.
A brief toilet and plumbing check can also be added to a seasonal home maintenance checklist.
Frequently Asked Questions
Q. Is water from the refill tube entering the overflow tube normal?
A. It can be normal while the tank is refilling. The fill valve should eventually shut off, and the tank’s main water level should not spill over the overflow opening.
Q. Should I replace the flapper or the fill valve first?
A. Follow the water. If tank water rises into the overflow opening, inspect the float and fill valve. If the water stops below the overflow but later leaks into the bowl, inspect the flapper or canister seal, chain, and seating surface.
Q. Why does jiggling the toilet handle stop the running?
A. Moving the handle may release a binding trip lever, reposition the chain, or allow the flush seal to close. Inspect those connected parts before replacing the handle or fill valve.
Q. Can I use a universal toilet repair part?
A. Do not assume it will fit. Toilets use different seal sizes, canister systems, attachment points, and fill-valve configurations. Confirm compatibility with the toilet model first.
Conclusion
Before replacing a part, determine whether tank water is spilling into the overflow tube or leaking past the flush seal. That observation separates a likely fill-side problem from a flush-side problem. Make only model-appropriate adjustments, verify every replacement part, and stop if the shutoff valve, porcelain, or external plumbing shows damage.