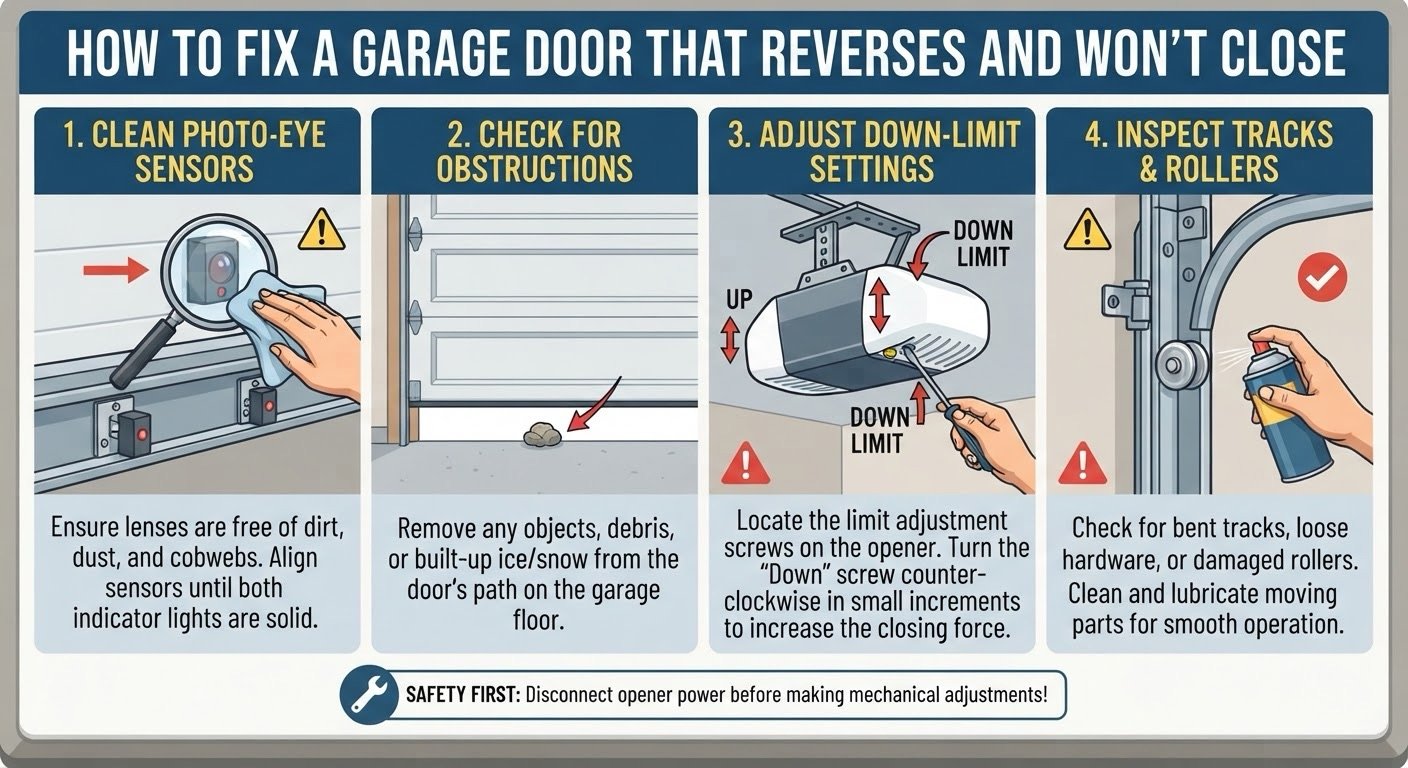
When a garage door starts closing and then reverses, first notice exactly when it changes direction. A door that reverses before reaching the floor may be reacting to a blocked or misaligned safety sensor or resistance in its movement. A door that touches the floor and then reopens may require a model-specific travel-setting check. Do not bypass or disable a safety device to keep the door operating.
If you are dealing with this now, start with the basic checks below. Dirty or misaligned safety sensors, track obstructions, and incorrect travel settings can all cause a garage door to reverse. The correct fix depends on when the door reverses and what you observe during operation. Stop troubleshooting and call a qualified technician if you find damaged cables, springs, or other high-tension hardware.
Why Does Your Modern Garage Door Keep Reversing?
Before jumping into the fix, it helps to understand the underlying mechanics. Modern automatic garage doors are built with strict safety regulations in mind. They feature a mandatory automatic reversal system designed to protect children, pets, and vehicles from getting crushed.
The Role of the Safety Reversal System
A reversal can be a correct response to an obstruction or a sign of a sensor, travel, or mechanical problem. Do not assume the safety system is simply too sensitive, and do not increase closing force to make the symptom disappear.
Step 1: Clean and Align the Safety Sensors (The Photo-Eyes)
A problem with the safety photo-eyes is a common reason a garage door reverses while closing. These two small sensors are normally mounted near the floor on opposite sides of the door opening. They send a beam across the opening, and many openers stop or reverse the door when that beam is blocked or misaligned. The exact indicator lights and troubleshooting steps vary by opener model, so consult the owner’s manual if the basic checks below do not resolve the problem.
- Check the Indicator Lights: Walk up to both sensors and look at the tiny LED lights on the side. If one light is blinking, flickering, or completely dark, the sensors are either misaligned, blocked by dirt, or experiencing a power issue.
- Wipe the Lenses: Over time, dust, cobwebs, lawn-mowing debris, and mud splash onto the lenses. Gently wipe both glass lenses clean using a soft microfiber cloth. Avoid using harsh chemical cleaners that could scratch the plastic.
- Adjust the Alignment: If a sensor bracket was bumped, the beam may be out of alignment. Follow the opener’s manual to identify the correct alignment indicator and adjustment method for your model. LED colors and blinking patterns vary by manufacturer, so do not rely on a universal green-or-red rule. Stop if the bracket, wiring, or sensor appears damaged.
Step 2: Check for Visible Obstructions and Damage
Sometimes, the issue isn’t electronic—it’s mechanical. If the garage door encounters physical resistance while moving down, the motor’s built-in safety mechanism senses the extra load and triggers a reverse to prevent motor burnout.
Maintenance Tips for Smooth Operation
- Inspect the Metal Tracks: Carefully examine the vertical and horizontal metal tracks. Look for accumulated dirt, hardened grease, dead insects, or small pebbles stuck in the curves. Wipe the tracks down thoroughly with a damp cloth.
- Follow model-specific maintenance instructions: Do not loosen, adjust, or work on springs, cables, bottom brackets, or other tensioned hardware. Have a trained technician investigate binding or damaged parts. Lubrication is not a substitute for repairing a mechanical fault.
- Use approved maintenance products: Follow the door manufacturer’s instructions for lubricant and application points. Do not grease the tracks or spray the sensors as an attempted repair.
Step 3: Check Model-Specific Travel Instructions
If your garage door actually reaches the floor, touches the ground, and then immediately bounces back up, your issue is likely the Close-Limit Switch. This switch tells the garage door motor exactly how far down it needs to travel before it is safely shut. If it’s set too tight, the motor thinks the floor is an obstruction.
- Identify the exact opener: Some models use adjustment screws; others use electronic programming buttons. Find the model’s manual before touching any control. Do not remove an electrical cover or guess at an unfamiliar adjustment.
- Fine-Tune the Down Limit: Do not assume which direction the adjustment control should turn. Find the opener’s model number and follow its owner’s manual. If the manufacturer permits a homeowner adjustment, use only the small increment specified in the manual and test the door after each change. Stop if the controls are not clearly identified or the door behaves unexpectedly.
- Verify the safety systems: After a permitted adjustment, perform both the contact-reversal test and the photo-eye test exactly as the model’s manual specifies. A door merely closing is not proof that its safety systems work. Keep everyone clear and stop using the opener if either test fails; arrange qualified service.
When Is It Time to Call a Professional?
Some reversing problems can be resolved with basic cleaning and model-specific adjustments, but there are times when DIY work is no longer safe. If you notice a damaged lift cable, broken spring, loose high-tension hardware, or an electrical problem inside the opener, stop immediately and contact a qualified garage door technician. Springs and cables can release dangerous amounts of stored energy and should not be repaired without proper training and equipment.
For a broader schedule of routine safety checks around the house, use this seasonal home maintenance checklist.
Frequently Asked Questions (FAQ)
Q: Why do I have to hold down the wall button to close my garage door?
A: On some openers this can indicate a sensor obstruction or alignment problem. Do not use a button-holding workaround as a repair. Check the visible obstruction and sensor conditions described in the manual, and arrange service if normal operation does not return.
Q: Can bad weather or heavy rain affect my garage door sensors?
A: Yes. Heavy rain can splash mud onto the low-mounted sensors, and severe thunderstorms or high winds can slightly shift the metal brackets out of alignment. Always inspect your sensors after a major storm if your door starts acting up.
Q: How often should I perform basic garage door maintenance?
A: Follow the inspection and testing schedule in your garage door opener’s owner’s manual. Regularly check the sensor lenses, tracks, rollers, hinges, and visible cables for dirt, damage, or unusual movement. Test the safety-reversal system using the manufacturer’s specified procedure and interval. Do not adjust or repair springs, lift cables, or other high-tension hardware yourself.
For an example of separate contact-reversal and sensor tests, see the safety-testing section of the Chamberlain RJO20 owner’s manual. Its settings and procedures apply to that model; use your own opener’s manual for the correct test.